
 Save
Save
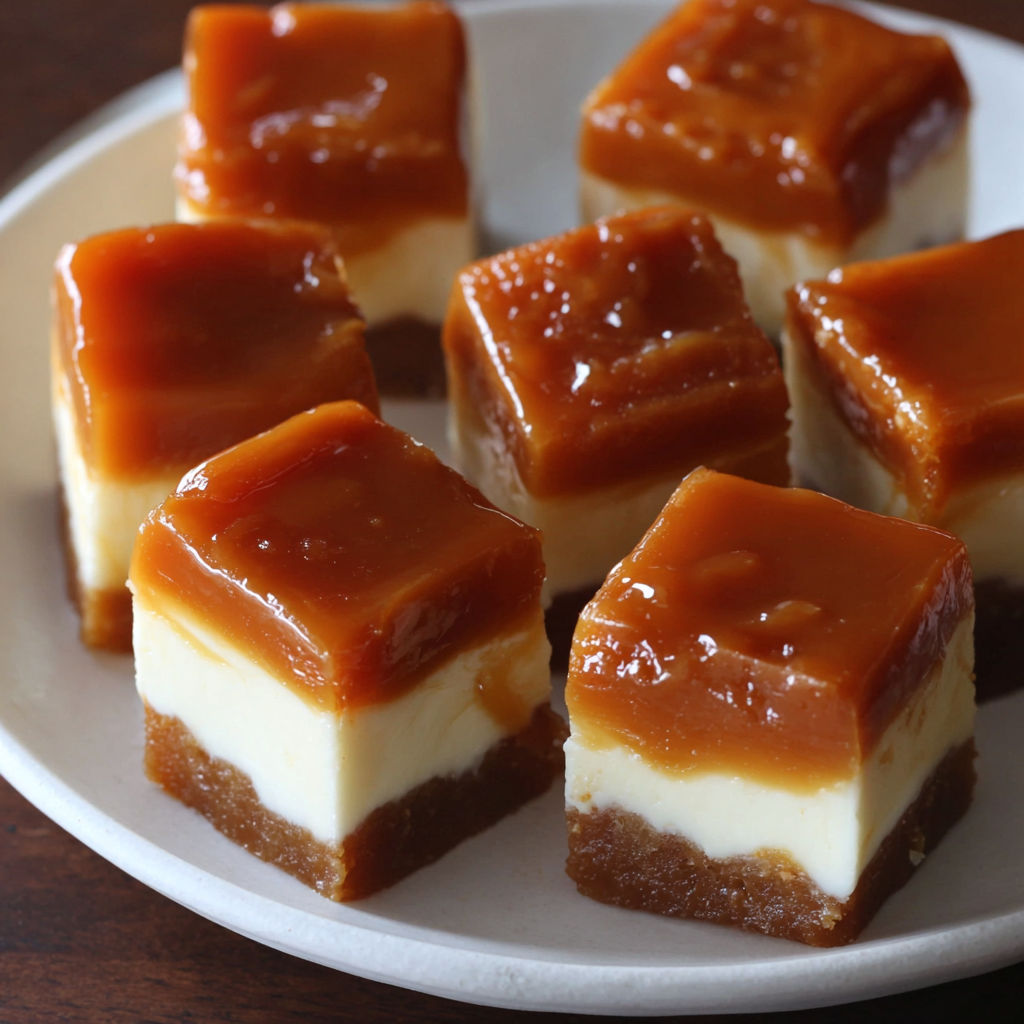
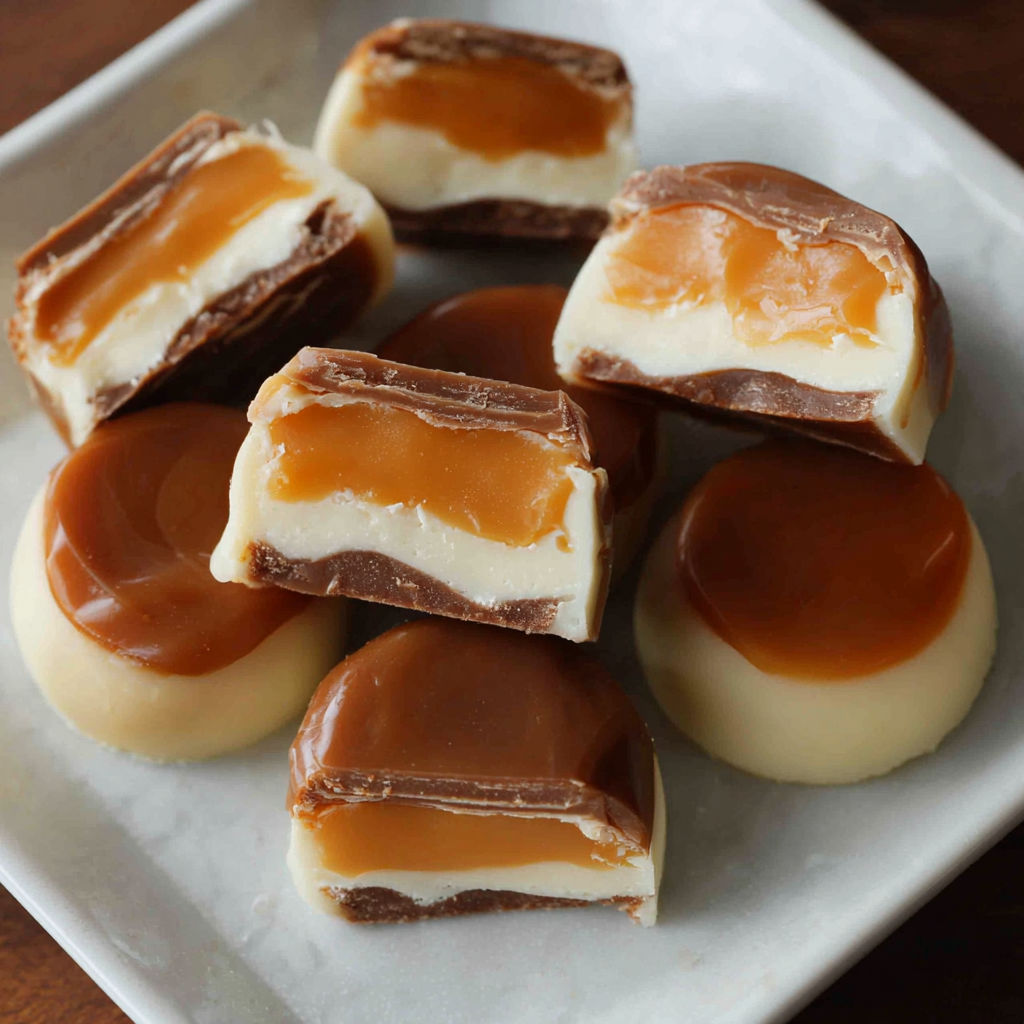
Soft and chewy Vanilla Cream Caramels bring together a buttery golden caramel and a velvety vanilla filling for an irresistible bite. I turn to this recipe for holiday gifts and special occasions because every batch feels delightfully nostalgic yet crowd-pleasing.
These caramels always remind me of childhood afternoons spent learning from my grandmother in her sunny kitchen. Now my family requests them every winter for our treat trays.
Ingredients
- Unsalted butter: Essential for richness and smoothness. Choose butter with 80 percent fat for best texture.
- Brown sugar: Adds deep caramel flavor. Light brown gives a more delicate note while dark brown adds bolder molasses tones.
- Salt: Rounds out sweetness and heightens the caramel notes. Use fine sea salt if possible.
- Evaporated milk: Contributes body and depth to the caramel. Use a fresh can, not sweetened condensed milk.
- Heavy cream: Ensures a luxuriously chewy bite. Select cream with at least 36 percent fat to avoid graininess.
- Corn syrup: Prevents crystallization and gives a glossy finish. Opt for light corn syrup with a clear color.
- Powdered sugar: Used in vanilla cream for a melt-in-the-mouth finish. Look for very fine powdered sugar to ensure no graininess.
- Vegetable shortening: Creates a creamy stable filling. Choose a good quality brand with minimal flavor.
- Vanilla: Provides warmth and fragrant sweetness. Use pure vanilla extract for the best result.
- Tips for best results: Weigh all your ingredients carefully. Caramel needs accuracy and a slow steady heat for perfect texture.
Instructions
- Prepare Workspace:
- Lay out a large sheet of parchment paper that measures larger than ten by sixteen inches to comfortably hold the caramel slab. This makes assembly and cutting easier and reduces any sticking or mess later on.
- Cook the Caramel:
- Using a heavy bottomed pot combine unsalted butter brown sugar salt evaporated milk heavy cream and corn syrup. Stir constantly over medium-low heat until everything is melted and dissolved. Stirring prevents scorching and ensures that the sugar melts evenly for a smooth caramel.
- Boil and Monitor Caramel:
- Raise the heat to medium while stirring and bring the mixture to a gentle boil. Once boiling turn heat to medium-high and keep stirring until your candy thermometer reads two hundred forty one degrees Fahrenheit. Maintain an even stir to avoid any burning on the bottom.
- Cool the Caramel:
- Shut off the heat and carefully pour the hot caramel onto your prepared parchment. Use a high heat spatula or wooden spoon to spread it into a ten by sixteen inch rectangle. Leave to cool completely so it firms up enough to handle. Cooling can take thirty minutes to an hour depending on your kitchen temperature.
- Make Vanilla Cream:
- While the caramel is cooling place vegetable shortening in a stand mixer and mix on low for about one minute just until creamy. Gradually add powdered sugar half a cup at a time then add vanilla and corn syrup. Continue mixing until the mixture forms crumbles that resemble soft cheese.
- Hydrate and Form Cream Center:
- Add a splash of water and mix again aiming for a play-doh texture. Add a few more drops of water if needed until the mixture clumps easily into a dough when squeezed together. Dump it out onto your work surface and knead until smooth and cohesive.
- Assemble Caramels:
- Slice the cooled caramel slab into four even pieces. Spread a thin layer of vanilla cream on each section leaving half an inch gap at the top edge for easy sealing. The cream layer should be about half the height of the caramel.
- Roll and Slice Caramel Logs:
- Carefully roll each caramel section into a log from bottom to top like a jelly roll. Use your hands to gently stretch and roll each log into a rope measuring about twelve to fifteen inches long. Aim for an even thickness and smooth out any seams.
- Portion and Package:
- Slice each log into half inch pieces using a sharp knife. Wrap the caramels in parchment or wax paper for neat presentation and freshness.
My favorite part of this recipe is the first bite through the tender caramel into the creamy vanilla center. Whenever I make them with my kids we always sneak a few trimmings before boxing the rest up for friends.
Storage Tips
Store wrapped caramels in an airtight tin layered with parchment to prevent sticking. Keep them at cool room temperature for soft and chewy texture. If your kitchen runs warm refrigerate briefly but allow caramels to come to room temp before serving so the centers soften again.
Ingredient Substitutions
No corn syrup on hand Try glucose syrup as a substitute for similar anti crystallizing properties. For a subtle twist swap classic vanilla extract for vanilla bean paste or bourbon vanilla for bolder aroma. If you want a slightly firmer caramel use less heavy cream by about ten percent.
Serving Suggestions
Arrange the finished caramels on a holiday cookie tray for festive sharing. For a beautiful dessert platter pair these with chocolate dipped fruits roasted nuts and crisp shortbread. I love tucking a handful into small cellophane bags tied with ribbon for quick gifts.
Cultural and Historical Notes
Caramels have roots in nineteenth century American candy making and remain a classic confection. The pairing of caramel and vanilla cream is influenced by old fashioned caramel creams also called bullseyes that you might find at vintage candy shops. Making them from scratch at home feels both timeless and comforting.
Seasonal Adaptations
Add a sprinkle of flaky salt to the caramel before rolling for a salted version. For autumn stir a hint of cinnamon or a pinch of ground nutmeg into the cream filling. In spring a touch of orange or lemon zest in the vanilla cream brightens the flavor.
Success Stories
Many readers have made these caramels for wedding favors or teacher gifts with rave reviews. I always hear about how kids love helping with the rolling and wrapping. Several friends say these have become their signature holiday sweet since learning the recipe.
Freezer Meal Conversion
Caramels freeze beautifully. Wrap each piece tightly in parchment and pack in a freezer bag or container. Thaw overnight at room temperature and the texture will be just as soft and creamy as fresh.
I learned after my first try that the playdough texture for the vanilla cream is non negotiable for a creamy rather than crumbly filling.
Common Recipe Questions
- → What equipment helps achieve the smoothest caramel?
A heavy duty, thick-bottomed pot and a candy thermometer are essential for even heating and accurate temperature control.
- → How can I prevent the caramel from sticking?
Lay down parchment paper before pouring the caramel. This helps make removal and rolling easier after cooling.
- → How do I know when the caramel has reached the right texture?
Check with a candy thermometer. Once the caramel reaches 241°F, it will cool to a soft yet chewy consistency.
- → What’s the key to smooth vanilla cream?
Mix powdered sugar, shortening, and corn syrup until a play-doh texture forms. Adjust with a splash of water if needed.
- → How should the finished caramels be stored?
Wrap each piece individually and store them in an airtight container to maintain freshness and prevent sticking.