
 Save
Save
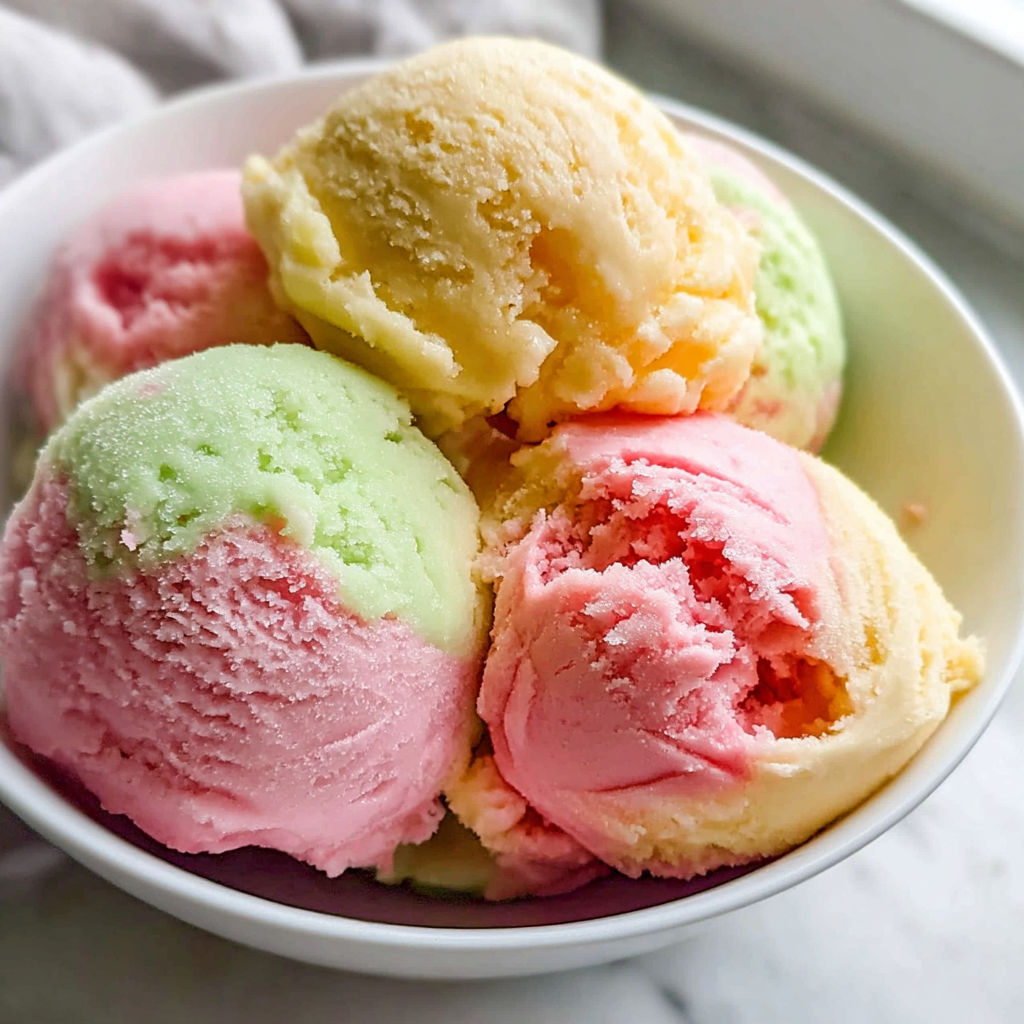
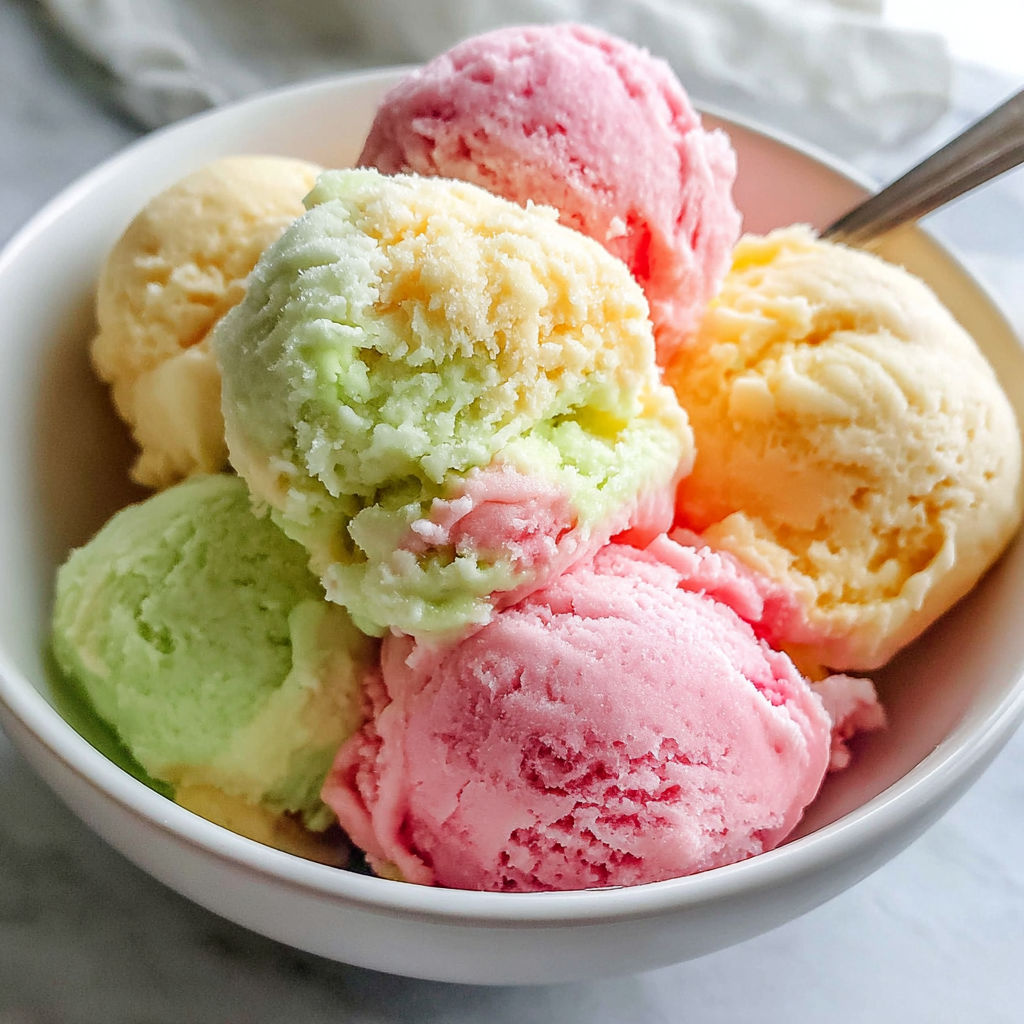
Homemade Rainbow Sherbet is the definition of a cheerful treat on warm days. Blending colorful fruit purees with creamy milk and a touch of tangy lemon, this dessert always brings a burst of happiness and a blast of juicy flavors. Whether for a party or as a bright ending to a family meal, nothing beats the magic of making it at home.
I first whipped up this sherbet on a scorching July afternoon with my nieces. We loved picking out fruits together and swirling the colors. The homemade version made us feel like ice cream masters and now it is a summertime tradition.
Ingredients
- Fruit puree such as strawberry mango or orange: brings bold color and flavor try to use really ripe fruit for maximum sweetness
- Granulated sugar: creates a balanced sweetness and helps keep the sherbet soft look for fine cane sugar that dissolves easily
- Lemon juice: brightens each fruity layer use fresh lemons for the best flavor
- Heavy cream: adds just enough richness without making it heavy choose cream with the highest fat content for smooth results
- Whole milk: makes the sherbet creamy a full fat variety works best for great texture
- Vanilla extract: rounds out the fruitiness buy real vanilla if you can for deeper aroma
- Water: helps thin the puree if fruit is especially thick filtered is best for taste
- Optional food coloring: makes the colors pop only if you want the classic rainbow look go for plant based colors if available
Instructions
- Select and Prep Fruits:
- Wash all your fruits under cool water. Remove stems pits or peels as needed. Chop them into even pieces so they blend smoothly.
- Make Fruit Purees:
- Working with one fruit at a time blend until completely smooth. If a puree is too thick splash in a bit of water. Aim for three separate purees and a total of about three cups.
- Sweeten and Brighten:
- Mix each fruit puree in its own bowl with a portion of sugar and lemon juice. Stir patiently until the sugar dissolves fully. Taste and tweak sweetness if you like.
- Blend Dairy Base:
- In a large clean bowl whisk together heavy cream whole milk and vanilla extract until completely blended for a rich base that binds your sherbet.
- Combine for Layers:
- Fold a scoopful of cream mixture into each puree to lighten them. If using food coloring add a drop to boost vibrancy. Keep each flavor separate for eye popping layers.
- Layer in a Pan:
- Spoon layers of each fruit mixture into a loaf pan or container. Use a spatula to gently smooth the top after each layer. The more precise your layering the prettier the result.
- Freeze and Stir:
- Cover your pan tightly and place it in the coldest part of your freezer. For the first three hours check every hour and give the mixture a strong stir. This breaks up ice crystals and makes the final texture smooth.
- Harden and Serve:
- Let the sherbet freeze fully at least four hours or overnight. Scoop out generous balls with a warm spoon and watch those colors swirl together

My favorite version uses ripe mangoes for the yellow layer because their tropical sweetness reminds me of summer picnics with my cousins. Swirling the colors together at the end always sparks memories of giggling and sneaking tastes straight from the freezer.
Storage Tips
Store homemade rainbow sherbet in an airtight container deep in your freezer. Press a sheet of wax paper or plastic wrap against the sherbet before sealing the lid to prevent ice crystals. For the smoothest texture let it sit on the counter for five minutes before scooping.
Ingredient Substitutions
To make this dairy free use canned coconut cream instead of heavy cream and almond or oat milk for the whole milk layer. Maple syrup or honey can swap in for sugar just add slowly and taste as you go. Try purees from frozen fruit if fresh is not in season just thaw and drain first for best color and consistency.
Serving Suggestions
Scoop sherbet into colorful bowls or cones and top with fresh berries or citrus zest. Swirl two or three flavors together for each serving to create a rainbow effect in every bite. For a fun twist set out a toppings bar with sprinkles coconut or chopped nuts.
Cultural and Historical Context
This dessert has roots in Italian sorbetto and American sherbert a classic childhood treat at birthday parties and ice cream parlors. Home cooks have always embraced it for being budget friendly and endlessly adaptable as tastes change over the years. Creating rainbow sherbet at home connects the nostalgia of childhood treats with the creativity of modern home kitchens.
Seasonal Adaptations
Make it with fruit in season for the brightest flavor and color. Blend in fresh mint leaves with the lemon layer for springy freshness. Use roasted fruit during cooler months for mellow caramel flavor.
Success Stories
My friend tried this recipe with her kids using peaches blueberries and watermelon. They loved creating their own color order and every scoop disappeared before dinner ended. Another family found it was the only frozen dessert everyone agreed upon for sibling birthday parties. I hear from readers who mail me photos of their rainbow creations with big grins and sticky chins.
Freezer Meal Conversion
For a grab and go frozen snack portion the sherbet into small cups with lids before freezing. These single serves are perfect for lunchboxes or quick treats. They thaw faster than larger scoops and make sharing even easier for neighborhood gatherings in the summertime.
This rainbow sherbet is a joyful project that brings delicious rewards. Make it once and you will want to try new flavors all summer long.
Common Recipe Questions
- → What fruits work best for colorful sherbet?
Brightly colored fruits such as strawberries, mangoes, oranges, or raspberries produce vibrant layers and delicious flavors.
- → How can the sherbet be made dairy-free?
Swap heavy cream and whole milk for coconut cream and almond or oat milk to create a creamy, plant-based version.
- → Can I adjust the sweetness?
Absolutely. Taste each fruit puree and add more sugar or lemon juice as needed before layering with the cream mixture.
- → How do I get smooth sherbet texture without an ice cream maker?
Stir the mixture every hour during the first few hours of freezing to minimize ice crystals and create a smoother texture.
- → Are there creative flavor variations?
Try adding herbs like mint or basil to certain layers for a fresh twist, or experiment with different fruit blends.