
 Save
Save
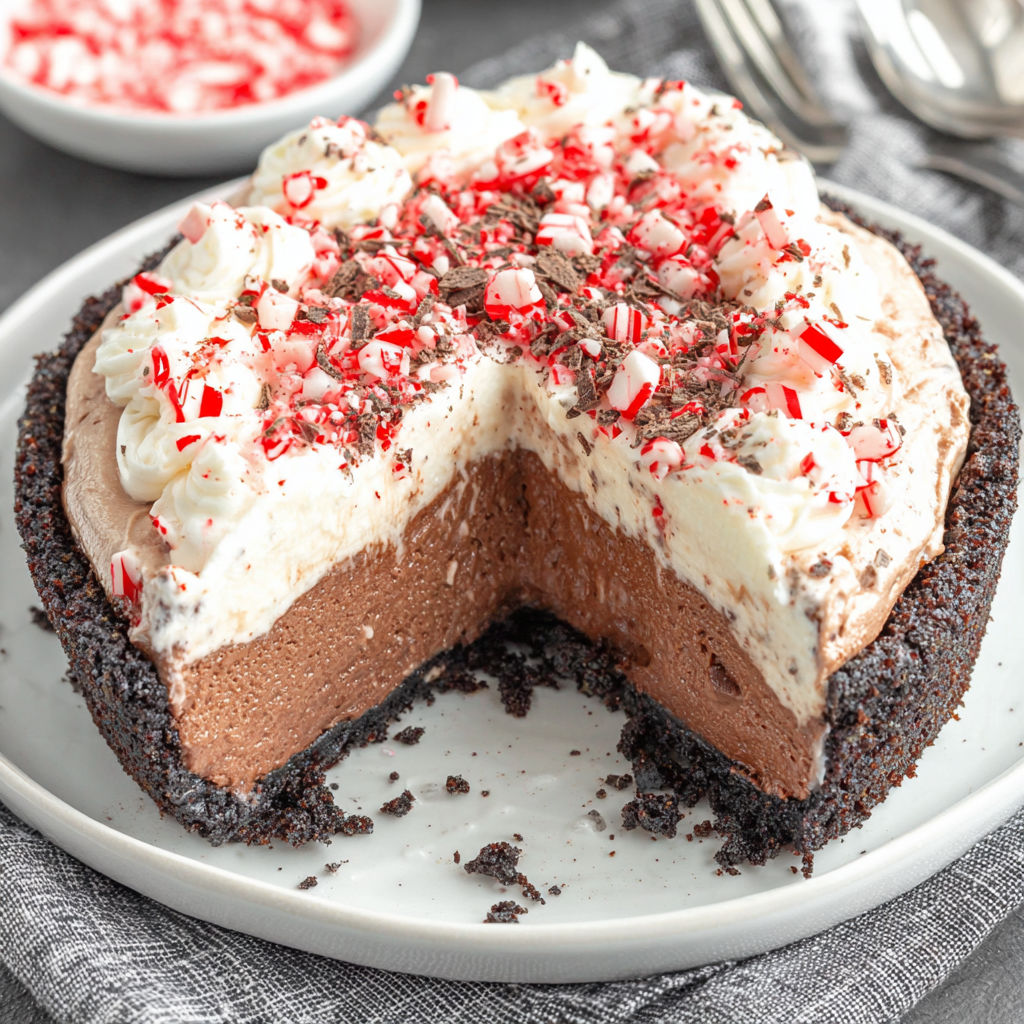
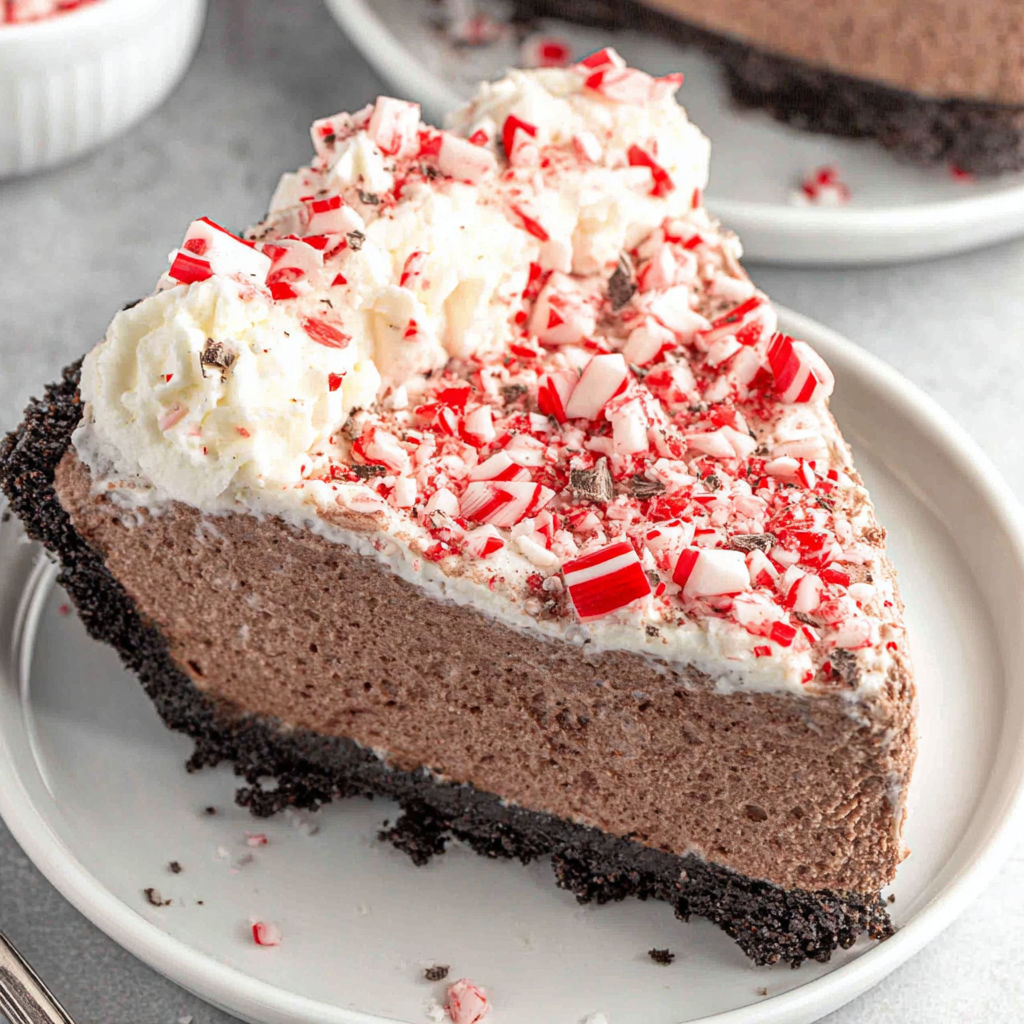
Chocolate Peppermint Mousse Pie is a dessert that brings together rich chocolate, cool peppermint, and a heavenly nutty crunch all in one dazzling holiday treat. This pie starts with a deep chocolate hazelnut crust and gets a creamy Nutella peppermint mousse filling, all crowned with a snowy drift of crushed candy canes. Every time I share this at a winter gathering, someone asks for the recipe before dessert is even over.
The first time I made this pie it felt like the ultimate upgrade on the classic chocolate mousse. My kids once begged for it again before we had finished the very first pie. Since then it comes out every December for our family movie nights.
Ingredients
- Hazelnuts: finely chopped. These give the crust a deep nutty flavor and perfect crunch. Try to use fresh hazelnuts and toast them lightly first for the best taste.
- Granulated sugar: sweetens both the crust and the silky mousse filling. Look for fine granulated sugar so it blends easily.
- All-purpose flour: helps the crust hold its shape. Make sure it is fresh and sifted for a tender result.
- Unsweetened dark cocoa powder: brings deep rich chocolate intensity. Go for a high-quality brand for the best flavor.
- Unsalted butter: softened for easy mixing and a buttery foundation in the crust and for greasing the pan. Use high-fat European style if possible.
- Kosher salt: brightens all the flavors and sharpens the chocolate notes.
- Cold water: used to bloom the gelatin. Make sure it is very cold so the gelatin sets up perfectly.
- Unflavored gelatin: holds up the mousse so it slices beautifully. Check the expiration date for best results.
- Chocolate hazelnut spread (Nutella): creates the creamy backbone of the mousse filling. Use a brand you love since this flavor really comes through.
- Cream cheese: softened for smooth blending and tanginess in the mousse. Look for the full fat block style.
- Peppermint extract: infuses cool refreshing peppermint flavor. Use pure peppermint extract not imitation.
- Heavy whipping cream: whips up fluffy and light to give the mousse a cloudlike texture. Always use it cold and buy fresh.
- Powdered sugar: a final dusting for garnish. Pick a fresh bag so it does not get lumpy.
- Crushed peppermint candy canes: for a signature finish. Use classic peppermint candy canes crushed just before sprinkling for brightest flavor.
Instructions
- Grease the Pan:
- Use a tablespoon of softened butter to generously grease the bottom and sides of a nine-inch springform pan. This helps the crust release cleanly after chilling and makes for a pretty slice.
- Make the Hazelnut Crust:
- Pulse the hazelnuts and granulated sugar in a food processor until finely ground. Add flour, cocoa powder, softened butter, and salt. Process everything together just until you have a well-mixed but slightly crumbly dough. Press this mixture into the greased pan forming an even layer. Press firmly with your hands or a flat-bottomed glass. Prick the bottom all over with a fork to prevent bubbling as it bakes.
- Bake and Cool the Crust:
- Set the pan in a preheated three hundred seventy-five degree oven and bake for eighteen to twenty minutes. You want the edges fragrant and set. Remove and let cool completely to room temperature so the filling will set up properly.
- Bloom and Melt the Gelatin:
- In a small saucepan pour cold water and sprinkle gelatin evenly over the top. Let it sit undisturbed for about two minutes to let the gelatin absorb water and bloom. Place over low heat and whisk gently just until the gelatin dissolves completely. Do not let it boil. Remove from heat and set aside to cool for a moment while you prep the filling.
- Make the Mousse Base:
- In a large mixing bowl beat chocolate hazelnut spread, cream cheese, and peppermint extract until thick, fluffy, and smooth. Scrape down the sides as needed to catch any unmixed pockets. Pour in the cooled gelatin mixture and beat again for two to three minutes until fully combined and shiny.
- Whip the Cream:
- Chill a large metal mixing bowl in the freezer for a few minutes before pouring in heavy cream. Add granulated sugar and beat with a clean whisk attachment until soft peaks form and the cream holds gentle mounds. Folding in this whipped cream by hand is what makes the mousse airy and light.
- Fold and Fill:
- Gently fold the whipped cream into the chocolate mousse base using a spatula. Work in several batches with slow folding motions so you keep as much air in the filling as possible. Pour the mousse evenly over the cooled crust and smooth the top.
- Chill the Pie:
- Place the entire pan in the fridge uncovered and chill at least three hours or overnight. The filling will set into a sliceable dreamy mousse.
- Release and Garnish:
- Run a plastic knife around the inside edge to loosen. Carefully remove the springform ring. Just before serving dust the top with powdered sugar and scatter generously with crushed peppermint candy canes.
My favorite part is watching the mousse puff up as I fold in the whipped cream. The peppermint scent always makes me think of baking with my grandma who used to crush candy canes with a rolling pin and sneak a few pieces while decorating.
Storage Tips
Store your finished pie in the fridge covered loosely with plastic wrap to prevent it from absorbing fridge odors. It keeps well for up to three days though the peppermint candy topping is crunchiest eaten within the first twenty four hours. If making ahead wait to add the crushed candy canes until just before serving.
Ingredient Substitutions
No hazelnuts on hand Try walnuts for a different nutty note or almonds for a classic taste. If you want to skip nuts entirely swap in crushed chocolate wafer cookies mixed with a little melted butter. For a dairy free version use vegan cream cheese and coconut whipped topping.
Serving Suggestions
This pie is perfect served in small wedges with fresh whipped cream or even a scoop of vanilla bean or peppermint ice cream. A drizzle of chocolate sauce or a little extra chocolate hazelnut spread makes each slice ultra decadent. Add a burst of color with more crushed candy canes or festive sprinkles for a holiday party.
Cultural Note
Peppermint and chocolate is an iconic holiday duo in American desserts. Combining them with a mousse pie format makes for a luxurious twist that nods to both classic European mousse cakes and nostalgic Christmas candy traditions.
Seasonal Adaptations
Swirl in a touch of orange zest with the peppermint for a winter citrus flair. Use dark chocolate curls and pomegranate seeds for a more grown up look. Try using mint chocolate cookies in the crust for extra bold flavor.
Success Stories
Friends have made this pie for everything from Friendsgiving to Christmas and not a single crumb was left. One neighbor liked it chilled so much that she served the leftovers right out of the fridge at a snow day brunch. My family always insists we double the peppermint candy on top.
Freezer Meal Conversion
For a longer storage option freeze the finished unadorned pie uncovered until firm then wrap tightly in layers of plastic wrap and foil. Thaw overnight in the fridge and decorate with crushed candy canes just before serving so they stay crisp and pretty.

Once you try this Chocolate Peppermint Mousse Pie you will want to make it part of your regular holiday baking circuit. Every bite feels like a celebration and your friends will probably ask for the recipe just like mine do every year.
Common Recipe Questions
- → How can I achieve a creamy mousse texture?
Whipping cold heavy cream in a chilled bowl until soft peaks form is key, then gently folding it into the chocolate-peppermint mixture helps create a light, airy texture.
- → What can I use in place of hazelnuts for the crust?
You can substitute walnuts, almonds, or pecans for a different nutty base. Make sure to chop them finely for easy blending with the other crust ingredients.
- → How do I prevent the crust from sticking to the pan?
Grease the springform pan generously with unsalted butter before pressing in the crust mixture to ensure easy removal after chilling.
- → Do I need to use gelatin?
Gelatin helps the mousse set firmly and hold its shape. If you skip it, the filling may be softer and less stable when sliced.
- → Can I prepare this dessert ahead of time?
Yes, the dessert benefits from overnight refrigeration, allowing flavors to meld and the texture to set for cleaner slices when serving.
- → How should leftovers be stored?
Store any remaining slices in an airtight container in the refrigerator for up to three days to maintain freshness.